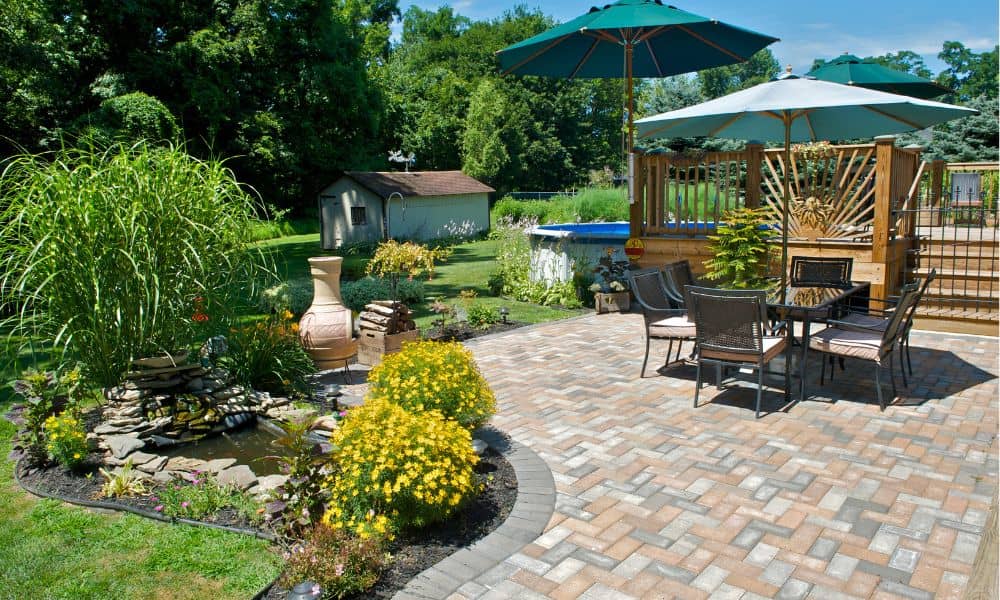
If you’re dreaming of a beautiful outdoor space, stone pavers can transform your backyard into a stunning patio. Stone pavers offer a natural look, durability, and charm that few other materials can match. However, to enjoy your stone paver patio for years without headaches, proper installation is key.
Why Stone Pavers Are a Great Choice
Stone pavers are perfect because they handle the weather well. With hot, humid summers and cool winters, your patio needs to withstand temperature swings and occasional heavy rains. Stone pavers, especially local types like sandstone or limestone, offer natural strength and texture. Plus, their slightly rough surfaces help prevent slips when it rains.
But it’s not just about looks. Proper installation prevents problems like sinking, cracking, or shifting over time. That’s why each step matters.
Step 1: Plan and Prepare Your Patio Area
Before you start digging, plan your patio’s shape and size carefully. Sketch out the design on paper or use spray paint to mark the ground. This way, you’ll avoid surprises during installation.
Next, clear the area. Remove grass, plants, rocks, and debris. Dig down about 6 to 8 inches to make space for the base and stone pavers. Madison’s soil can vary, so make sure you remove any soft spots that might cause settling later.
Step 2: Create a Strong Base for Stability
A solid base is the foundation of your patio. Without it, your stone pavers may sink or shift.
Start by laying a layer of crushed gravel or stone, about 4 to 6 inches deep. This layer helps with drainage and prevents water from pooling under the patio. Spread the gravel evenly and compact it well using a hand tamper or plate compactor. Don’t rush this step—compacting well makes a big difference.
On top of the gravel, add a 1-inch layer of coarse sand. This layer creates a smooth bed for the stone pavers and helps with leveling. Use a long board or straight edge to level the sand. Remember, the base needs to slope slightly away from your house for water to drain properly.
Step 3: Choose the Right Stone Pavers
Selecting stone pavers isn’t just about picking pretty stones. Think about size, thickness, color, and texture.
In Madison, thicker pavers (about 1.5 to 2 inches) work best for patios since they handle foot traffic and weather well. Natural stones like sandstone or limestone blend beautifully with local homes and landscapes.
Also, consider color. If your home has warm brick tones, picking pavers in earth tones like tan or rusty red will create a nice match.
Step 4: Lay the Stone Pavers Carefully
Now, the fun part—placing your stone pavers!
Start at a corner or edge and work your way across the patio. Place each stone on the sand bed, gently pressing it into place. Use a rubber mallet to tap each stone down and ensure it’s level with the others. Check often with a level to keep the surface even.
Maintain consistent spacing between stones. Most patios use gaps of about 1/8 to 1/4 inch, which allows for joint filling later.
If you’re working with irregular shapes, fit the stones like puzzle pieces. Take your time to create a tight, natural-looking pattern.
Step 5: Fill the Joints for Strength and Stability
Filling the gaps between your stone pavers locks them in place and prevents weeds.
For patios, polymeric sand is a great choice. This special sand hardens when wet, making it less likely to wash away while still allowing some flexibility.
Sweep the polymeric sand into the joints, making sure they are fully filled. Then, use a broom to remove excess sand from the surface.
Next, lightly mist the patio with water to activate the polymeric sand. Be careful not to overwater—it should just dampen the sand enough to harden.
Step 6: Seal Your Stone Paver Patio (Optional but Recommended)
Sealing your patio isn’t necessary, but it can help protect the stone from stains and weather damage.
Choose a sealer designed for natural stone and suitable for Madison’s humid climate. Apply it evenly following the manufacturer’s instructions, usually with a roller or sprayer.
Sealing also enhances the color of your stone pavers, giving your patio a fresh, vibrant look.
Step 7: Maintain Your Patio for Longevity
Even the best-installed patio needs some care. Regular maintenance keeps it looking great and lasting longer.
- Sweep often to remove dirt and debris.
- Wash the patio with mild soap and water if it gets stained. Avoid harsh chemicals that can damage stone or sand joints.
- Check the joints yearly and add polymeric sand if you notice gaps.
- Inspect for loose stones or cracks and repair them promptly.
Remember, the effort you put into maintenance will save you money and hassle later.
Why Proper Installation Matters More Than You Think
You might wonder why so much focus goes into the base, leveling, and joint filling. The truth is, stone pavers installed without care will settle unevenly, crack, or let weeds grow through the joints. Over time, this can ruin your patio’s look and force costly repairs.
In Madison, weather conditions like heavy rain or freeze-thaw cycles can speed up damage if installation steps are skipped or done poorly. By following these steps, you create a patio that stays beautiful and strong for years, resisting the challenges of climate.
Final Thoughts
Installing stone pavers may seem like a big project, but breaking it down step-by-step makes it manageable—even if you’re new to DIY. If you’d rather leave it to the pros, experienced masonry services can help make sure your patio is built to last and looks great.
Your patio will be more than just a place to relax—it will be a durable, charming part of your home that you and your family enjoy for many seasons. So grab your tools, pick your favorite stones, and get ready to create a patio that lasts.