Why Outdoor Fire Pits Are the Ultimate Backyard Upgrade
There’s nothing quite like gathering around a warm fire under the open sky. Whether it’s roasting marshmallows, entertaining guests, or simply enjoying a quiet evening, an outdoor fire pit adds instant charm and functionality to any backyard.
Homeowners across the country are turning to custom masonry fire pits to create cozy, beautiful outdoor spaces that increase both comfort and property value. If you’re thinking about building one, this expert guide will walk you through the key design decisions, materials, and safety tips to help you create a stunning and lasting feature.
Step 1: Choose the Right Location for Your Fire Pit
Before breaking ground, you need to carefully consider where the fire pit will go. A good location ensures safety, comfort, and visual appeal.
🔍 Key Factors:
- Clearances: Keep the pit at least 10–20 feet away from structures, trees, fences, and overhangs.
- Wind direction: Place your pit where smoke won’t blow into seating areas or your home.
- Ground slope: Flat, level areas work best. Avoid spots where water pools or where runoff may affect the structure.
Remember, your outdoor fire pit should feel like a natural extension of your outdoor living space.
Step 2: Decide on Fuel Type – Wood vs. Gas
Your fuel source will influence cost, installation, and user experience.
🔥 Wood Fire Pits:
- Traditional and rustic feel
- Requires more maintenance and cleanup
- Sparks and smoke may need screening
🔥 Gas Fire Pits:
- Cleaner and easier to operate
- Requires a gas line (adds installation cost)
- Limited flame size compared to wood
Check local building codes and HOA regulations—some areas restrict open wood fires.
Step 3: Select Durable Materials for a Long-Lasting Fire Pit
Masonry fire pits shine because of their strength and timeless appeal. Choosing the right materials ensures your fire pit will withstand heat, weather, and time.
Best Materials:
- Fire brick: Highly heat-resistant; used to line the interior
- Natural stone: Granite, bluestone, or slate for a rustic look
- Brick: Classic choice with a warm, traditional style
- Concrete block: Affordable and versatile for custom shapes
Work with an experienced masonry contractor to choose materials that blend with your landscape and home design.
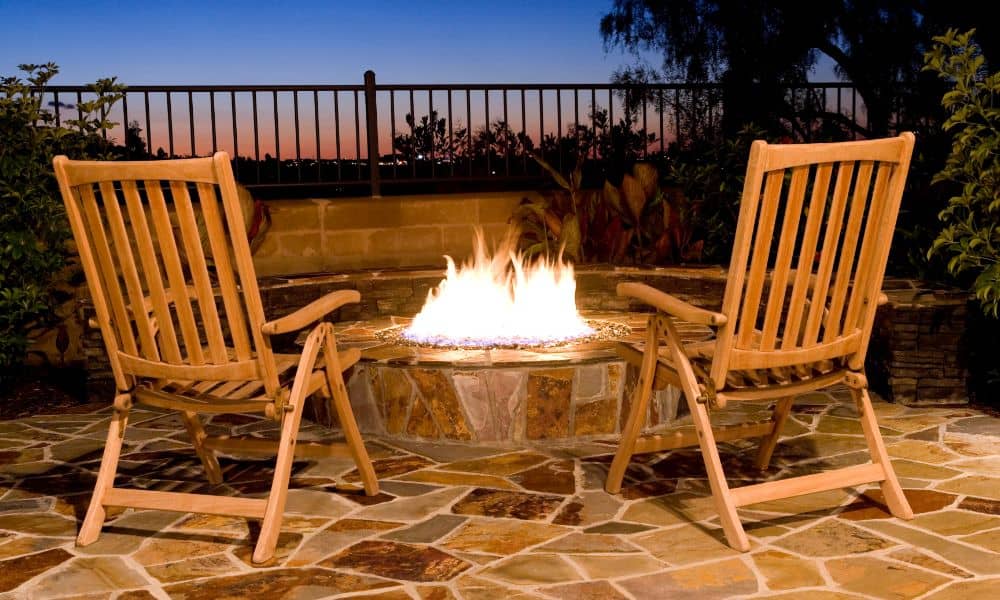
Step 4: Pick the Right Fire Pit Style and Shape
The shape and structure of your fire pit affect both aesthetics and how people gather around it.
Popular Shapes:
- Round: Ideal for conversation; encourages circular seating
- Square or rectangular: More modern; easier to align with patios or furniture
- Custom built-ins: Blend seamlessly with stone walls or outdoor kitchens
You can also choose between above-ground or sunken styles. Above-ground fire pits are easier to install and maintain, while sunken pits offer a more dramatic, built-in look.
Step 5: Incorporate Smart Masonry Design Features
Experienced masonry contractors can add custom features that elevate your fire pit from functional to exceptional.
Ideas:
- Built-in seating with stone or brick benches
- Fireproof liners to protect masonry from extreme heat
- Retaining walls or planters to frame the area
- Drainage system under the fire pit to prevent water buildup
These elements add both comfort and durability to your outdoor retreat.
Step 6: Think About Seating and Layout Flow
Great fire pit design isn’t just about the flames—it’s about the space around it.
Seating Considerations:
- Ensure there’s enough space between the pit and furniture (usually 3–6 feet)
- Use paver stones or gravel for the base to keep the area dry and clean
- Add low-voltage lighting to illuminate the space at night
Think in terms of zones—a fire pit area should feel like its own outdoor “room” while still connecting with the rest of your yard.
Safety Tips for Building and Using a Fire Pit
Safety should never be an afterthought when dealing with open flames.
🔒 Fire Pit Safety Basics:
- Always use non-combustible materials
- Never place a fire pit directly on wood decks or grass
- Keep a fire extinguisher or water source nearby
- Use a spark screen to contain embers (especially with wood fires)
- Regularly inspect and clean your fire pit to remove ash buildup
Follow local fire ordinances and seasonal burn bans to stay compliant and safe.
Why Hire a Masonry Expert to Build Your Fire Pit
While DIY kits are available, nothing beats the quality and beauty of a custom-built masonry fire pit.
Benefits of Working with a Professional:
- Code compliance: Ensures safe, legal installation
- Material expertise: Helps you choose the right stone or brick
- Customization: Tailored to your yard, vision, and lifestyle
- Durability: Built to last with professional craftsmanship
A professional stone mason or masonry contractor will turn your fire pit idea into a lasting outdoor centerpiece.
Cost to Build an Outdoor Fire Pit
Prices vary depending on design, materials, and labor, but here’s a general breakdown:
| Type | Estimated Cost Range |
| DIY kit (basic) | $300 – $700 |
| Professional masonry (simple) | $1,500 – $3,000 |
| Custom fire pit with seating/walls | $3,500 – $7,000+ |
Additional costs may include permits, gas line installation, or lighting.
Conclusion: Create Warm Memories with the Right Design
An outdoor fire pit isn’t just a backyard accessory—it’s a lifestyle upgrade. By thoughtfully designing your space and working with expert masonry contractors, you’ll create a cozy, elegant feature that brings people together and adds lasting value to your home.
Ready to build your dream fire pit? Consult a local masonry expert and turn your backyard into a warm, welcoming retreat.
FAQs About Outdoor Fire Pit Design and Masonry
Q1: Do I need a permit to build an outdoor fire pit?
In many areas, yes. Always check with your city or county before starting.
Q2: Can I build a fire pit on a deck or patio?
Only with proper insulation and clearance—gas fire pits are safer for decks.
Q3: What’s the ideal fire pit size?
Most fire pits range from 36″ to 48″ in diameter. It depends on your space and seating needs.
Q4: How do I maintain a masonry fire pit?
Clear out ash after use, check for cracks, and reseal stone or brick annually if needed.
Q5: Can a fire pit be used year-round?
Yes! Add blankets or a heat lamp and enjoy it even in cool seasons.
Q6: Is stone or brick better for fire pits?
Both work well—stone is more rustic, while brick offers a classic look and consistent shape.